Difference between revisions of "Material Test Suite OXP"
m (Spelling and stuff. Removed note on 1.74.0 bug.) |
(Updating BB links) |
||
| (8 intermediate revisions by 3 users not shown) | |||
| Line 1: | Line 1: | ||
| − | The '''Material Test Suite''' is an expansion pack which tests Oolite’s [[Materials in Oolite|material model]] and built-in shaders. | + | The '''Material Test Suite''' is an expansion pack which tests Oolite’s [[Materials in Oolite|material model]] and built-in shaders. It was created during the testing phase before version 1.76 to test material functionality across different platforms and hardware. It may be useful in diagnosing some rendering problems. '''This page was last properly edited in 2014''' |
| + | |||
| + | {{OXPNote|This OXP has since been updated (2018)}} | ||
| + | See [https://bb.oolite.space/viewtopic.php?p=265381#p265381 note] & [https://bb.oolite.space/viewtopic.php?p=265409#p265409 another note] for details - Cube side #17 (more sophisticated gloss test) | ||
| + | :[https://github.com/OoliteProject/oolite/commit/aa0dcbb297e9195b1ab998b1f18d184bff1da12b Download (GitHub)] | ||
To run the test suite: | To run the test suite: | ||
| − | * | + | * Download the test suite and install it. (Oolite test release 1.75 or later required. For information on installing expansion packs, see [[OXP#Installing an OXP"|the “OXP” article]].) |
| − | * Run Oolite, and decline when asked whether you want to | + | ** For Oolite 1.75–1.77: [http://jens.ayton.se/oolite/files/material-test-suite-1.2.oxp.zip Material Test Suite 1.2] |
| + | ** For Oolite test release 1.79 (January 2014) or later: [http://jens.ayton.se/oolite/files/material-test-suite-1.3.oxz Material Test Suite 1.3] | ||
| + | * Run Oolite, and decline when asked whether you want to load a game. (If you are using Strict Mode, disable it and restart Oolite.) | ||
* You should now be presented with an information screen and the options “Run test suite” and “Cancel”. Select “Run test suite”. | * You should now be presented with an information screen and the options “Run test suite” and “Cancel”. Select “Run test suite”. | ||
* You will now be shown a series of spinning cubes. The precise number shown depends on your system’s capabilities. A successful test shows a grey box with a number on it (see [[#Sample Images|sample images]] below). A failed test will show something else, typically a solid black box. | * You will now be shown a series of spinning cubes. The precise number shown depends on your system’s capabilities. A successful test shows a grey box with a number on it (see [[#Sample Images|sample images]] below). A failed test will show something else, typically a solid black box. | ||
| − | * Please take a note of any failed tests, writing down the label shown on the left of the screen (such as “simple: 3”). If it is something other than a | + | * Please take a note of any failed tests, writing down the label shown on the left of the screen (such as “simple: 3”). If it is something other than a solid black or red box, please also take a screen shot (“'''*'''” key). |
* While you’re at it, we’d appreciate if you tested dust rendering. When the test suite is complete, leave the station and fly away until you are no longer mass locked. Fly at normal speed and at hyperspeed (default: “'''J'''” key). Note whether you see dust particles flying past. Test this in every available shader mode (to change shader mode, pause, press “'''2'''” or “'''F2'''”, and select “Game Options…”). | * While you’re at it, we’d appreciate if you tested dust rendering. When the test suite is complete, leave the station and fly away until you are no longer mass locked. Fly at normal speed and at hyperspeed (default: “'''J'''” key). Note whether you see dust particles flying past. Test this in every available shader mode (to change shader mode, pause, press “'''2'''” or “'''F2'''”, and select “Game Options…”). | ||
If all the tests work and dust is nicely dusty, we’re done. You can throw out the Material Test Suite expansion pack and get back to playing the game. Otherwise, please report the problem: | If all the tests work and dust is nicely dusty, we’re done. You can throw out the Material Test Suite expansion pack and get back to playing the game. Otherwise, please report the problem: | ||
* Quit Oolite and open the log file. (To locate the log file, see [[Oolite FAQ#Diagnosing Problems|the FAQ entry on diagnosing problems]].) | * Quit Oolite and open the log file. (To locate the log file, see [[Oolite FAQ#Diagnosing Problems|the FAQ entry on diagnosing problems]].) | ||
| − | * Copy the lines between “<code>========== [Marker 1] ==========</code>” and “<code>========== [Marker 2] ==========</code>”. Paste them into an e-mail to [mailto:bugs@oolite.org bugs@oolite.org] or [ | + | * Copy the lines between “<code>========== [Marker 1] ==========</code>” and “<code>========== [Marker 2] ==========</code>”. Paste them into an e-mail to [mailto:bugs@oolite.org bugs@oolite.org] or [https://bb.oolite.space/viewtopic.php?t=8038 this forum thread] (or send the whole log as an attachment). Don’t forget to specify which tests failed! |
If your tests passed, feel free to report anyway. Confirmation that we’re doing something right is good for our egos. But if they failed, we really need to know. We can’t fix problems we don’t know about. | If your tests passed, feel free to report anyway. Confirmation that we’re doing something right is good for our egos. But if they failed, we really need to know. We can’t fix problems we don’t know about. | ||
| Line 81: | Line 87: | ||
'''Bug:''' For unknown reasons, the shininess of test 16 does not match that of tests 13–15.<br clear="all" /> | '''Bug:''' For unknown reasons, the shininess of test 16 does not match that of tests 13–15.<br clear="all" /> | ||
| + | |||
| + | == Notes == | ||
| + | The original version of this was created by [[User:Ahruman|Ahruman]], presumably as part of his project of introducing shaders into Oolite. The first (v.1.0) & second versions came out in 2010, the third in 2011 and the fourth in 2014 (v.1.3). [[User:Another commander|Another commander]] came out with a fifth in 2018 (on GitHub - see link above). | ||
[[Category:Oolite expansion packs]] | [[Category:Oolite expansion packs]] | ||
Latest revision as of 02:08, 29 February 2024
The Material Test Suite is an expansion pack which tests Oolite’s material model and built-in shaders. It was created during the testing phase before version 1.76 to test material functionality across different platforms and hardware. It may be useful in diagnosing some rendering problems. This page was last properly edited in 2014
See note & another note for details - Cube side #17 (more sophisticated gloss test)
To run the test suite:
- Download the test suite and install it. (Oolite test release 1.75 or later required. For information on installing expansion packs, see the “OXP” article.)
- For Oolite 1.75–1.77: Material Test Suite 1.2
- For Oolite test release 1.79 (January 2014) or later: Material Test Suite 1.3
- Run Oolite, and decline when asked whether you want to load a game. (If you are using Strict Mode, disable it and restart Oolite.)
- You should now be presented with an information screen and the options “Run test suite” and “Cancel”. Select “Run test suite”.
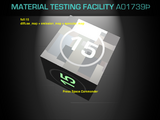
- You will now be shown a series of spinning cubes. The precise number shown depends on your system’s capabilities. A successful test shows a grey box with a number on it (see sample images below). A failed test will show something else, typically a solid black box.
- Please take a note of any failed tests, writing down the label shown on the left of the screen (such as “simple: 3”). If it is something other than a solid black or red box, please also take a screen shot (“*” key).
- While you’re at it, we’d appreciate if you tested dust rendering. When the test suite is complete, leave the station and fly away until you are no longer mass locked. Fly at normal speed and at hyperspeed (default: “J” key). Note whether you see dust particles flying past. Test this in every available shader mode (to change shader mode, pause, press “2” or “F2”, and select “Game Options…”).
If all the tests work and dust is nicely dusty, we’re done. You can throw out the Material Test Suite expansion pack and get back to playing the game. Otherwise, please report the problem:
- Quit Oolite and open the log file. (To locate the log file, see the FAQ entry on diagnosing problems.)
- Copy the lines between “
========== [Marker 1] ==========” and “========== [Marker 2] ==========”. Paste them into an e-mail to bugs@oolite.org or this forum thread (or send the whole log as an attachment). Don’t forget to specify which tests failed!
If your tests passed, feel free to report anyway. Confirmation that we’re doing something right is good for our egos. But if they failed, we really need to know. We can’t fix problems we don’t know about.
Sample Images
Click the images for a bigger view. Note that tests 8–16 will not be shown on systems without GLSL shader support.
Test 1: diffuse_map only.
Test 2: diffuse_map and emission_map.
Note that the number 2 glows green in the dark.
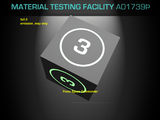
Test 3: emission_map only.
Note that the number 3 and the ring both glow green in the dark.
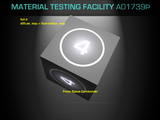
Test 4: diffuse_map and illumination_map.
Note that number 4 is illuminated as though by a spotlight (with a slightly blue tint).
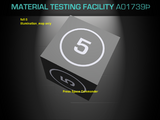
Test 5: illumination_map only.
Note that the number 5 and the ring both glow with a dull blue tint.
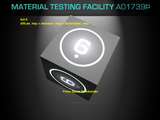
Test 6: diffuse_map, emission_map and illumination_map.
Note that the number 6 is illuminated as in test 4, and the ring glows with a slight green tint.
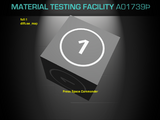
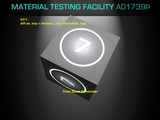
Test 7: diffuse_map and emission_and_illumination_map.
When rendered correctly, the effects should be the same as in test 6.
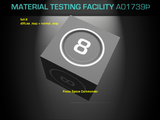
Test 8: diffuse_map and normal_map.
Note the shadows and highlights around the inside of the ring, which conform to the main light source, producing the effect of an indentation containing the number 8.
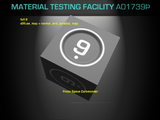
Test 9: diffuse_map and normal_and_parallax_map.
This should look similar to test 8, but with slightly better perspective. If you noticed a “creeping” effect in test 8, it should be alleviated in test 9. This is more noticeable if you look at the tests again.
Test 10: emission_map and normal_and_parallax_map.
The number 10 and the ring glow as in test 3, and the interior of the ring is indented as in test 9.
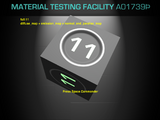
Test 11: diffuse_map, emission_map and normal_and_parallax_map.
The ring is white and the number 11 glows green, as in test 2, and the interior of the ring is indented.
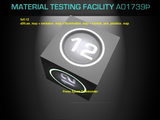
Test 12: diffuse_map, emission_map, illumination_map and normal_and_parallax_map.
The ring glows and the indented area around the number is illuminated as though by a spotlight, as in tests 6 and 7.
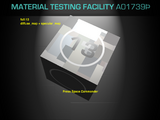
Test 13: diffuse_map and specular_map.
Note that the number 13 is only visible as a variation in the glossiness of the surface, and completely invisible in shadow.
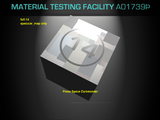
Test 14: specular_map only.
Note that the number 14 and the ring are only visible as a variation in the glossiness of the surface, and the cube is uniformly grey in shadow.
Test 15: diffuse_map, emission_map and specular_map.
A shiny surface as in tests 13 and 14, but width a glowing number 15.
Test 16: diffuse_map, emission_map, illumination_map, normal_and_parallax_map and specular_map.
Everything all at once: like test 12, but with the varying shininess from tests 13–15.
Bug: For unknown reasons, the shininess of test 16 does not match that of tests 13–15.
Notes
The original version of this was created by Ahruman, presumably as part of his project of introducing shaders into Oolite. The first (v.1.0) & second versions came out in 2010, the third in 2011 and the fourth in 2014 (v.1.3). Another commander came out with a fifth in 2018 (on GitHub - see link above).

