Difference between revisions of "OXP howto model"
m (formatting) |
m (→Subentities: sub-sub-entities are possible) |
||
| Line 113: | Line 113: | ||
*Exhausts: although they are defined seperate from subentities, they can be regarded as subentities. | *Exhausts: although they are defined seperate from subentities, they can be regarded as subentities. | ||
| − | One important thing to remember | + | One important thing to remember is that [[Shipdata.plist#frangible|frangibility]] is defined for the main entity, not seperately for every SE. |
| − | |||
| − | |||
== Links == | == Links == | ||
Revision as of 08:36, 18 October 2012
Contents
Create your model
in Wings3D or a similar program.
How you do this is up to your creativity, but Aegidian has created the following tutorial for Wings3D.
If you've read the tutorial above it's time to think about a few more things.
Optimize
Optimizing models and textures for a game is no fun, specially if it's a model with lots of greebles and funny details.
Simple example
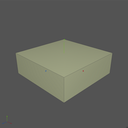
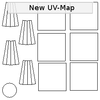
So let's stick with a simple example - a simple cone combined with a cube. When creating the UV-Map in Wings3D this map is really in no way optimized. Doing optimizations as postprocess is a real pain, believe me .-)
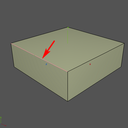
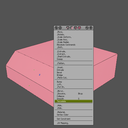
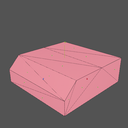
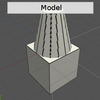
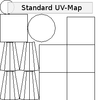
Let's say you have created a model in Wings3D (pic 1) and created the UV-Map (pic 2). You can see that Wings3D does some preparations for you, e.g. the UV information is taking place in the maps area and the polygons are separated (in chunks), based on the method you've used to create the UV-Map. It's a good starting point but far away from a optimum for a game.
Waisted texture informations
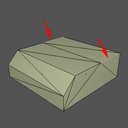
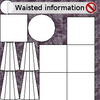
You can see in a few OXPs background images in the UV-Maps (pic 3). This is just waisted texture information, results in bigger filesizes and and makes optimization tools pretty senseless. These tools are using Deflate, LZ77, RLE (Run-length_encoding) and other algorithms to optimize the texture information streams in the maps. Better use a solid color (black, grey or white).
Waisted faces
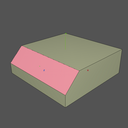
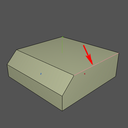
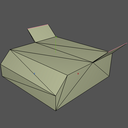
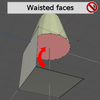
Wings3D is a box-modeller and creating objects in Wings3D always results in closed objects. Result is that quite a few faces are just waisted (pic 4), because they are not visible at all, but still eating memory and processing time. This can easily go in a few thousands of faces when a lot of models are used in installed OXPs. Luckily there's a way as Wings3D provides a hole material. This is a special feature to reduce the amount of data when exporting the model as .obj as the faces won't appear in the exported model and UV-Map.
Resort the map
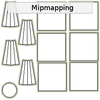
The next step is to resort (and sometimes scale) the polys in the UV-Mapper. Best practice is to leave a little bit space between polys (pic 5). This is a lesson I had to learn with my models. I was always wondering why some artifacts appeard at the edges and why the mipmapping doesn't work properly.
Mipmapping
To get it working properly expand the areas with real texture information by a few pixels (pic 6). Oolite will do the mipmapping (if its available) automagically. Mipmapping or Level of Detail (LOD) is a antialiasing technique to improve the quality when textures are minified / magnified. See Mipmap for more infos.
Tesselation is evil
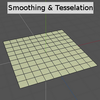
And last but not least tesselation (or subdivision) is evil if its used to smooth objects appearance. We can see it in a growing number of released OXPs, and it is really the worst case. Tesselation (pic 7) is a time eater for a game as it increases vertex and face counts a lot and often enough results in higher texture sizes. Both are adding time to the setup of entities whenever they are spawned in the game. Oolite handles smooth groups and hard/soft edges so in most cases there is absolutely no need to raise v/f counts. A really simple example how to use the smoothing option in combination with materials entries in Oolite can be found in the RVandGS.oxp.
Details and Greebles
Another point to consider is if a detail has to be done in the model itself or if this can be placed in a normal map.
Export the model
to obj( mtl texture) and convert to *.dat format.
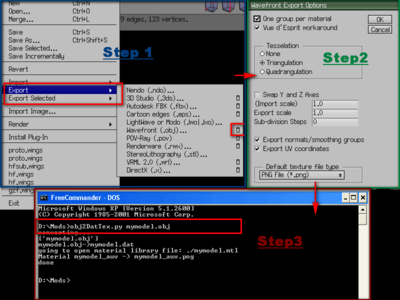
The picture above shows 3 simple steps to export the model and use one of the converter scripts to get the .dat file.
- If you have the Wings stuff ready for export (means a model with UV-Map), simply use the Wavefront (obj) exporter (Step 1+2). You'll need to configure it as shown in Step 2. Once exported you have three files (.obj, .mtl and .png).
- Copy the
Obj2DatTex.py(orObj2DatTexNorm.py) to your folder where the model is saved to. - Open a shell and switch to the folder with the model (and script) and type in:
Obj2DatTex.py mymodel.obj(Step 3).
Please note that the converter scripts need Python 2.6 or higher (but won't work with 3.x!!).
Edit shipdata.plist
Supply the in-game values relevant to your model.
Subentities
Entities can have sub-entities, which are defined by quaternions. There are several types of SE:
- Model Entities: can be any model, with any properties.
- Turrets: are a specialised model entity.
- Flashers: blinking lights
- Exhausts: although they are defined seperate from subentities, they can be regarded as subentities.
One important thing to remember is that frangibility is defined for the main entity, not seperately for every SE.
Links
- List of software - useful tools.
- Converter scripts - helpers for models and plists.
- Materials_in_Oolite - further infos about textures in Oolite.
