Difference between revisions of "Factory Paint Jobs"
(→Resources) |
(→Resources) |
||
| Line 40: | Line 40: | ||
If you want to play with the paint.net files (a Windows-only graphics editing package) used to create these packs, you can download the ZIP package here: [[Media:FactoryPaintJobs_Resources.zip|FactoryPaintJobs_Resources.zip]] (~33mb) | If you want to play with the paint.net files (a Windows-only graphics editing package) used to create these packs, you can download the ZIP package here: [[Media:FactoryPaintJobs_Resources.zip|FactoryPaintJobs_Resources.zip]] (~33mb) | ||
| − | Notes: | + | Notes:<br/> |
(1) Each file (one for each ship type) has a number of layers, at least one per design, with the layer type set to "Overlay". The process of creating the final versions was to merge the colour layer onto the diffuse layer (which is normally the bottom layer in all the files) to create a single image. Because there are a lot of layers, you'd need to move the target layer down to be just above the diffuse layer before merging it down. I would then copy that image, paste into a new file, and save that as the variation. I would then return to the master, undo the merge, and move on to the next variation.<br/> | (1) Each file (one for each ship type) has a number of layers, at least one per design, with the layer type set to "Overlay". The process of creating the final versions was to merge the colour layer onto the diffuse layer (which is normally the bottom layer in all the files) to create a single image. Because there are a lot of layers, you'd need to move the target layer down to be just above the diffuse layer before merging it down. I would then copy that image, paste into a new file, and save that as the variation. I would then return to the master, undo the merge, and move on to the next variation.<br/> | ||
(2) There are times when I use two layers for the final image. This usually happens when I want to make a particular colour (usually white) stand out more on the merged final image.<br/> | (2) There are times when I use two layers for the final image. This usually happens when I want to make a particular colour (usually white) stand out more on the merged final image.<br/> | ||
Revision as of 02:08, 4 July 2022
Contents
Overview
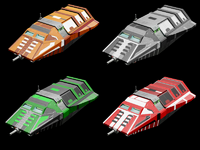
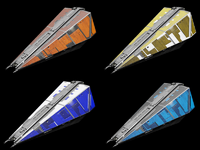
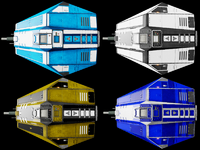
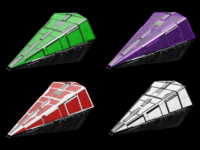
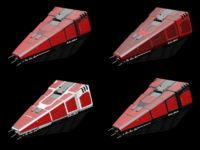
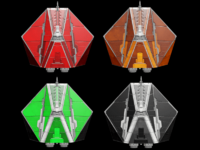
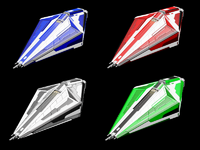
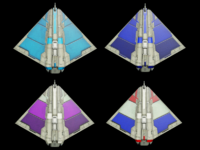
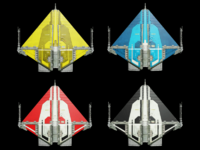
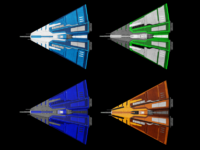
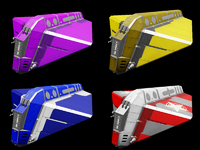
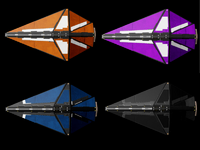
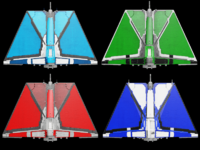
Factory Paint jobs are a set of OXP's that expand the pools of the core ship sets with paint jobs that suggest something that has come out of the factory. The colours are designed to be recognisable from a distance.
Gallery
|
|
|
|
|
|
|
|
|
|
|
|
|
Details
Adder pack: 24mb, 27 paint jobs
Anaconda pack: 27mb, 36 paint jobs
Asp Mk2 pack: 23mb, 27 paint jobs
Boa pack: 26mb, 36 paint jobs
Boa Mk2 pack: 22mb, 36 paint jobs
Cobra Mk1 pack: 23mb, 27 paint jobs
Fer-de-lance pack: 17mb, 27 paint jobs
Gecko pack: 44mb, 27 paint jobs
Krait pack: 35mb, 27 paint jobs
Mamba pack: 33mb, 27 paint jobs for Mamba, 14 for Mamba Escort
Moray pack: 30mb, 27 paint jobs for Moray, 14 for Moray Med
Python pack: 17mb, 27 paint jobs
Sidewinder pack: 40mb, 27 paint jobs for standard Sidewinder, 18 for Sidewinder Escort
Resources
If you want to play with the paint.net files (a Windows-only graphics editing package) used to create these packs, you can download the ZIP package here: FactoryPaintJobs_Resources.zip (~33mb)
Notes:
(1) Each file (one for each ship type) has a number of layers, at least one per design, with the layer type set to "Overlay". The process of creating the final versions was to merge the colour layer onto the diffuse layer (which is normally the bottom layer in all the files) to create a single image. Because there are a lot of layers, you'd need to move the target layer down to be just above the diffuse layer before merging it down. I would then copy that image, paste into a new file, and save that as the variation. I would then return to the master, undo the merge, and move on to the next variation.
(2) There are times when I use two layers for the final image. This usually happens when I want to make a particular colour (usually white) stand out more on the merged final image.
(3) Whenever I was working with one of the colour layers, I always turned off "Antialiasing". The reason is, the gap between the panels is mostly 1 pixel wide. When doing flood fills with Antialiasing turned on, you can get colours jumping panels when edges are blurred. To keep the lines sharp, I turn Antialiasing off.
(4) As a final step, after I finished creating all the images, I would use pngcrush to make all the images a bit smaller.
Downloads
Download FactoryPaintJobs_Adder.oxz v1.0 (downloaded 0 times).
Download FactoryPaintJobs_Anaconda.oxz v1.1 (downloaded 0 times).
Download FactoryPaintJobs_Asp.oxz v1.0 (downloaded 0 times).
Download FactoryPaintJobs_Boa.oxz v1.1 (downloaded 0 times).
Download FactoryPaintJobs_BoaMk2.oxz v1.1 (downloaded 0 times).
Download FactoryPaintJobs_CobraMk1.oxz v1.1 (downloaded 0 times).
Download FactoryPaintJobs_Ferdelance.oxz v1.0 (downloaded 0 times).
Download FactoryPaintJobs_Gecko.oxz v1.1 (downloaded 0 times).
Download FactoryPaintJobs_Krait.oxz v1.1 (downloaded 0 times).
Download FactoryPaintJobs_Mamba.oxz v1.1 (downloaded 0 times).
Download FactoryPaintJobs_Moray.oxz v1.1 (downloaded 0 times).
Download FactoryPaintJobs_Python.oxz v1.0 (downloaded 0 times).
Download FactoryPaintJobs_Sidewinder.oxz v1.0 (downloaded 0 times).
License
This work is licensed under the Creative Commons Attribution-Noncommercial-Share Alike 4.0 Unported License. To view a copy of this license, visit http://creativecommons.org/licenses/by-nc-sa/4.0/
Quick Facts
| Version | Released | License | Features | Category | Author(s) | Feedback |
|---|---|---|---|---|---|---|
| 1.0 | 2022-07-04 | CC BY-NC-SA 4.0 | Ships | Retextures OXPs | phkb | Oolite BB |
