OXP howto plist
Contents
To Begin
To begin making a Property List, all one needs is a text editor and a purpose. Although any text editor will do, it is helpful to use a specialized plist editor (such as Sub Etha Edit or PlistEdit Pro for the Mac, Vim for Linux/Windows).
The plists that appear in Oolite may be in two formats, XML and ASCII. The favoured format for most plists, XML, will always begin with the Apple header:
<?xml version="1.0" encoding="UTF-8"?>
<!DOCTYPE plist PUBLIC "-//Apple Computer//DTD PLIST 1.0//EN" "http://www.apple.com/DTDs/PropertyList-1.0.dtd">
<plist version="1.0">
...the various types of data will make up the body, and then in closing...
</plist>
There is no better way to learn the correct way to make plists, than to examine the ones found within Oolite and working OXPs. The format lends itself to easily copy/paste desired items, and change them as fancied. This also minimizes the chance of little parser errors.
Correcting with PLUTIL (Macintosh)
Since a very small mistake is enough to stop a plist from being accepted, it's important to be exact about every letter and sign. The Mac Terminal utility has a very practical tool for catching parser errors. After opening Terminal, simply type plutil, add one space, and drag and drop the plist in question onto the Terminal window. This will cause the 'address' of the plist to be shown. Hit return, and Terminal will reveal whether or not the plist is OK. If it's not, you will be given a clue to what is wrong, and the line number of the error.
Basic Examples
The plists for a very simple OXP, for instance one containing a space advertising billboard, could contain this:
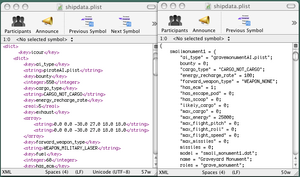
shipdata.plist
Code:
<?xml version="1.0" encoding="UTF-8"?>
<!DOCTYPE plist PUBLIC "-//Apple Computer//DTD PLIST 1.0//EN" "http://www.apple.com/DTDs/PropertyList-1.0.dtd">
<plist version="1.0">
<dict>
   <key>billboard1</key>
   <dict>
      <key>ai_type</key>
      <string>dumbAI.plist</string>
      <key>bounty</key>
      <integer>0</integer>
      <key>cargo_type</key>
      <string>CARGO_NOT_CARGO</string>
      <key>energy_recharge_rate</key>
      <real>0.0</real>
      <key>forward_weapon_type</key>
      <string>WEAPON_NONE</string>
      <key>has_ecm</key>
      <false/>
      <key>has_escape_pod</key>
      <false/>
      <key>has_scoop</key>
      <false/>
      <key>likely_cargo</key>
      <integer>0</integer>
      <key>max_cargo</key>
      <integer>0</integer>
      <key>max_energy</key>
      <real>100</real>
      <key>max_flight_pitch</key>
      <real>0.5</real>
      <key>max_flight_roll</key>
      <real>0.5</real>
      <key>max_flight_speed</key>
      <real>0.0</real>
      <key>missiles</key>
      <integer>0</integer>
      <key>model</key>
      <string>billboard1.dat</string>
      <key>name</key>
      <string>Billboard</string>
      <key>roles</key>
      <string>asteroid(0.05)</string>
      <key>scanClass</key>
      <string>CLASS_ROCK</string>
      <key>thrust</key>
      <real>0.05</real>
      </dict>
</dict>
</plist>
This is the only mandatory plist inside folder Config, to accompany the model named billboard1.dat in Models, and billboard1_texture.png in Textures, which would complete the minimal billboard.oxp, placing a slow spinning, lifeless object into the game.
Because roles contains asteroid(0.05), this should cause our billboard to have a rare (and weird) appearance in the middle of an asteroid field. This is a little awkward and not much chance of seeing our model frequently, so we would make a small addition to roles.
      <key>roles</key>
      <string>asteroid(0.05) billboard</string>
and include another plist in order to force an appearance of our model. This by either a script.plist or planetinfo.plist.
script.plist
Example 1
Code:
<?xml version="1.0" encoding="UTF-8"?>
<!DOCTYPE plist PUBLIC "-//Apple Computer//DTD PLIST 1.0//EN" "http://www.apple.com/DTDs/PropertyList-1.0.dtd">
<plist version="1.0">
<dict>
   <key>billboard_at_witchpoint</key>
   <array>
       <dict>
       <key>conditions</key>
          <array>
            <string>status_string equal STATUS_EXITING_WITCHSPACE</string>
          </array
          <key>do</key>
          <array>
             <string>addShips: billboard 1</string>
          </array>
       </dict>
   </array>
</dict>
</plist>>
This will ensure that one entity with the role 'billboard' will pop up at the Witchpoint every time a player arrives. A very simple 'rendezvous' script.
Example 2
Or one could begin with an alternate simple script, this one in the ASCII format:
Code:
{
   "billboard_near_station" = (
       {
           conditions = (
               "status_string equal STATUS_LAUNCHING"
           );
           do = (
               "addSystemShips: billboard 1 1.0"
           );
       }
   );
}
Since addSystemShips is used instead of addShips, it will be followed by a number that gives a spawn destination at some point on the space lane between the Witchpoint (0.0) and the station (1.0). This script will make our entity show up somewhere in the Aegis every time the player leaves the station.
planetinfo.plist
As the above scripts are a very general method of summoning our entity (although scripts could easily be a great deal more specific!), the planetinfo.plist gives an easy oportunity to be specific within a system. Used for many things including customizing planets and system data, its also simple to add script_actions for an entity appearance.
example 1
Code:
{
    "0 7" = {
           "script_actions" = (
                "checkForShips: billboard",
                {
                     conditions = ("shipsFound_number lessthan 1");
                     do = ( "addSystemShips: billboard 1 1.0" );
                }
          );
     }
}
Consulting the Oolite planet list tells us that 0 7 is galaxy:1, planet:Lave. Using the action of checkForShips with the condition that shipsFound_number is zero prior to adding our model, will ensure that only 1 billboard will be waiting outside the Lave station, and no more (in the unlikely event that the engine has a deja vu and spawns one or two more billboard models).
example 2
Code:
{
    "0 7" = {
           "script_actions" = (
                "checkForShips: billboard",
                {
                     conditions = ("shipsFound_number lessthan 1");
                     do = ( "addShipsAt: billboard 1 pwm 18175 66430 22320" );
                }
          );
     }
}
This is unnecessarily complex for a virgin planetinfo experiment, but goes to show how specific one may be. In this case, addSystemShips is replaced with addShipsAt, and what follows is a quite exact destination using the coordinate scheme (as described in Methods) . The numbers following pwm plots a point very close to the Lave station buoy, and using addShipsAtPrecisely would do so to even more exactl degree. To see the pwm coordinates at any time in space, press shift-f.
Note that coordinates such as these are not interchangable between planets, as stations will be located at different places from system to system.
WrapUp
So put your shipdata and your script or planetinfo into the Config folder which, along with Textures and Models, is placed in a folder to be named billboard.oxp. These are just a very few of the plist options for a model OXP, but enough to introduce an entity into the game universe.
